
Catching sea smoke – How hard can it be?
For those who know what I mean may be snickering, Sea smoke is not terribly difficult to photograph. Normal principles apply, like good composition, lighting, and so forth. You just need to be by the ocean, a good focal point (lighthouses work nicely), and stand there shooting different shots in subzero temperatures. Not hard at all…
These are my tips for “Safely” photographing Sea smoke or sea fog, whatever you want to call it. It’s not difficult to do,but the goal is not to lose a nose, fingers, or toes, while getting the pictures.
I’ve photographed sea smoke many times over the years, and with the right conditions, it can be very dramatic. What makes this type of photography difficult is the level of danger. It’s not in your face, photographing a grizzly bear, level-dangerous, it’s an insidious danger that can catch you unawares.
Most people know when the weatherman starts talking about windchills that they need to bundle up. But they will jump in the car and turn the heat on with a hat, mittens, and a jacket. They will drive to the store, jump out, run in, get the milk, jump back in the car, and go home. They assume that because they didn’t have any issues, the threat of the “wind chill” is wildly exaggerated. (but if they slid off the road and weren’t rescued in 30 min to an hour, it could be a very different story), and not a good ending!
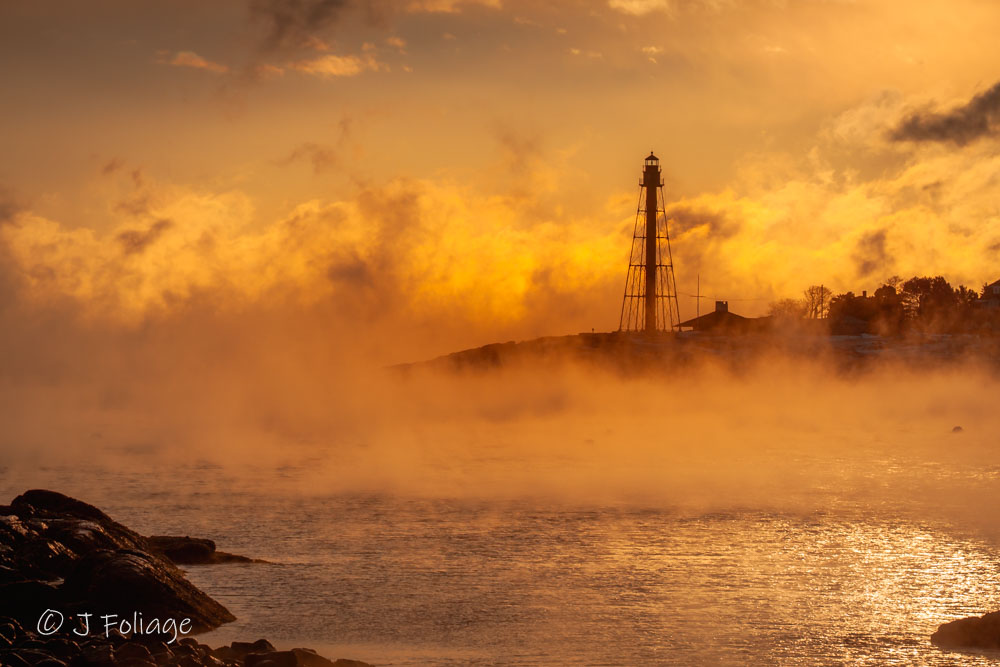
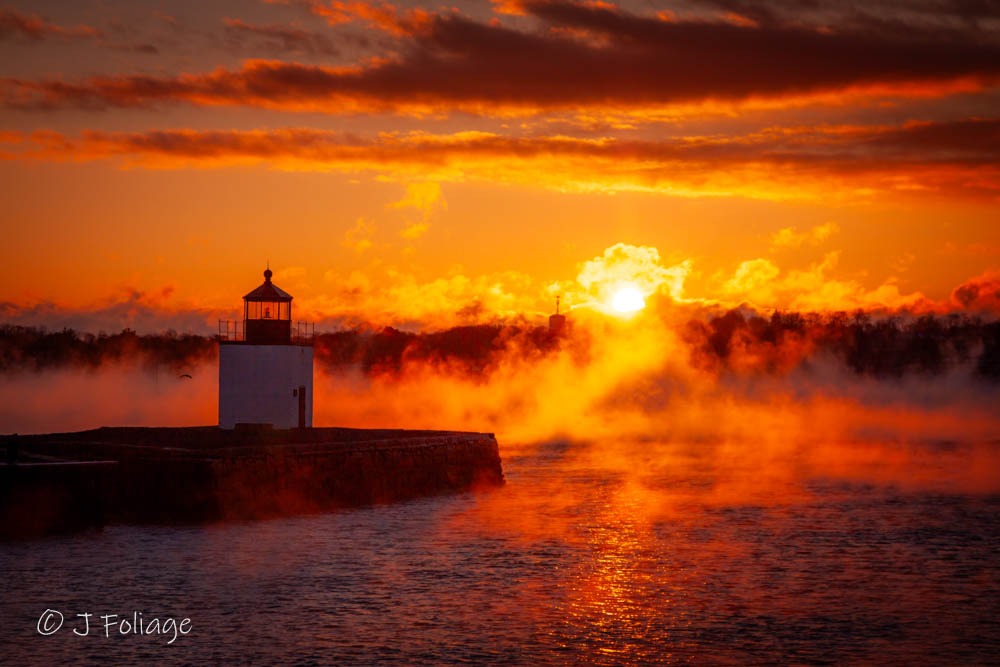
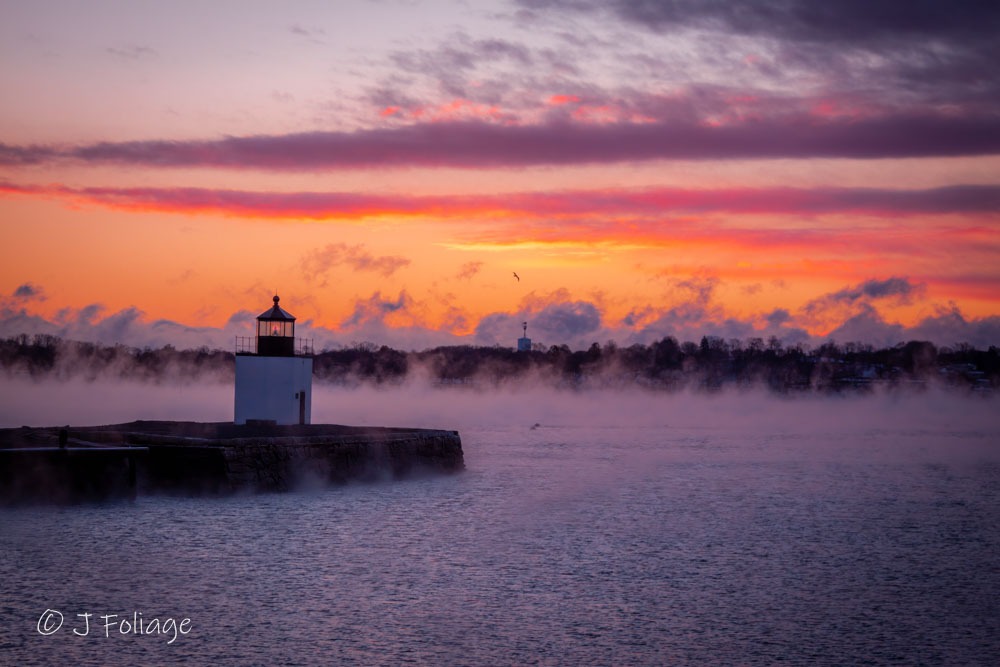
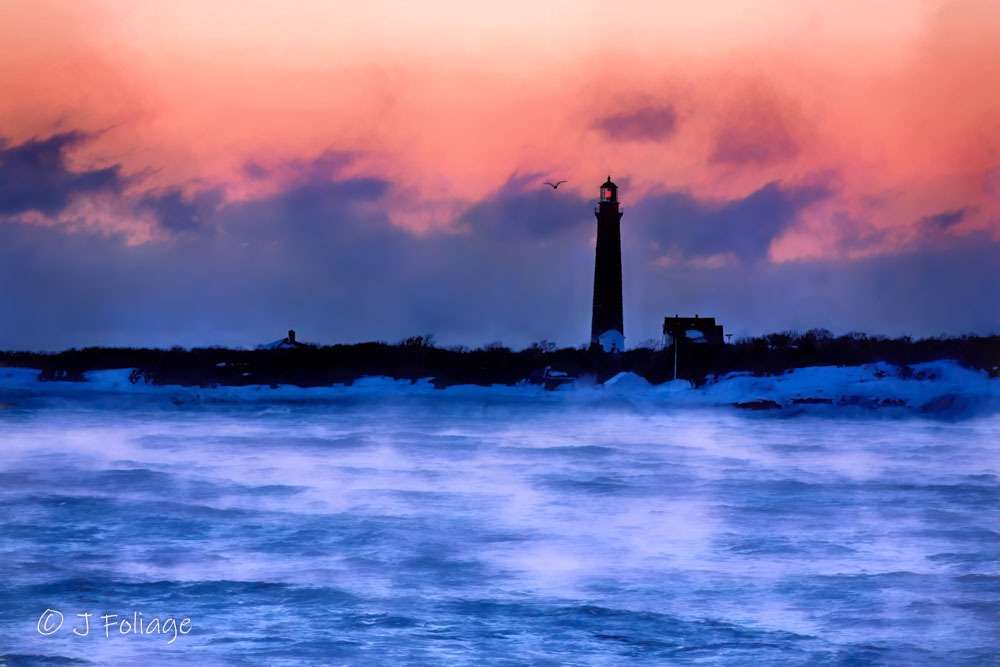
The temperatures needed for Sea smoke are “usually” negative numbers, so if it’s a chilly 5F to 10F degrees (above zero) It may or may not create sea smoke (we need a temperature differential). We’re usually looking for a negative 4 (-4 Fahrenheit) or lower temps. So let’s talk first about the conditions we are looking for.
What Causes Sea Smoke (or Arctic Fog)
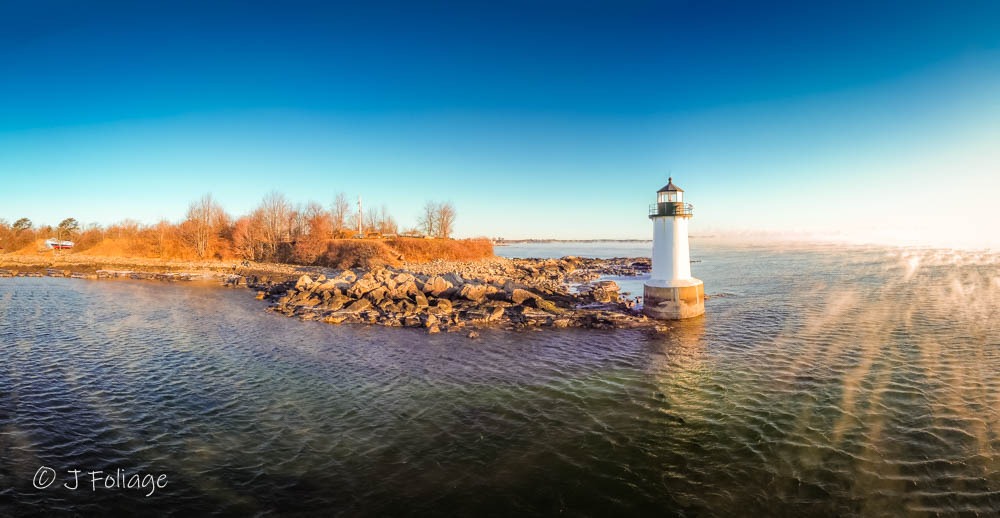
Sea smoke is simply a wicked, cold, frigid layer of air over a body of water that is relatively warmer(by 30 degrees). The average ocean temp varies between 32°F and 36°F off of Salem, Massachusetts. So what we are looking for is a high temperature differential, meaning the best chances occur when the difference between the water temperature and air temperature is at least 30+ degrees. Simple, right? Now let’s talk about the dangers and considerations of going outside to capture sea smoke.
Conditions lead to danger
So in all cases that I have found and photographed sea smoke, I have been at the edge of the ocean. (You may find it at a lake, but it usually has frozen over before getting to this point. Either way, the temperatures are always frigid, cold, or worse, dangerously cold, and the top three dangers we need to worry about are:
- Hypothermia (Low Body Temperature)
- Frostbite (Tissue Freezing)
- Cardiovascular Strain and Heart Attack
I will admit that I’m not an adventure photographer. Each time that I have gone out looking for sea smoke, I have stayed fairly close to the car. Even with the car close by, and I mean 20 yards away, I still have to keep these dangers in the back of my mind.
I wonder, am I confused? How would I know if I’m confused (A sign of hypothermia)? I’m not talking out loud, so I don’t know if my speech is slurring (another sign). What about memory loss (another sign), well, I can’t remember, so that doesn’t help. Lastly, fumbling hands, now this is something to watch because I’m handling my camera, and I guess if I drop it and can’t pick it up, I may be in trouble
My big worry is that Frostbite (losing extremities) happens fast in below zero temps (5-15 minutes). I’ll go over my clothing selections in the next section. To date, I have lost NO body parts to frostbite, but I came home one time, and my finger tips were in pain for several days. BUT… I got this shot!
I didn’t worry about Cardiovascular Strain (Extreme cold causes blood vessels to constrict, which raises blood pressure and forces the heart to work much harder.) I should worry more about this one because I have had a valve replaced. Symptoms: Chest pain, shortness of breath, sudden fatigue, or pressure in the chest. This also sounds more like shoveling than standing behind my tripod… But duly noted.
🛡️ Personal Safety & Warmth Checklist
- Monitor Mental Clarity: Periodically check in with yourself; if you feel confused or find your speech slurring, get to a warm environment immediately.
- The 10-Minute Extremity Check: Wiggle your fingers and toes every few minutes. If you lose sensation or feel sharp pain, frostbite may be starting.
- Layering for the Wind: Ensure your outer layer is a dedicated “wind-stop” material, as wind chill can make -4°F feel like -30°F or worse.
- Protect Your Heart: Avoid sudden heavy exertion in subzero temps, as the cold constricts blood vessels and puts extra strain on your cardiovascular system.
- Stay Near Shelter: When shooting in these extreme conditions, try to stay within a short walk of a heated vehicle or building to use as a “recovery station”.
- Eye Protection: Use ski goggles in high winds to prevent your eyes from being directly exposed to the freezing air.
Equipment and cold temps
I’ve caught sea smoke with my Canon camera, my cellphone, and my first drone. Each device has things to watch for.
Managing Your Camera Gear in Subzero Temps
Mechanical parts in any camera—whether mirrorless, DSLR, or analog—can freeze or become sluggish if exposed to extreme cold for too long. However, the most critical challenge for modern photographers is power.
The Battery Battle All digital cameras rely on batteries, and extreme cold causes them to discharge rapidly. I always carry 4–5 fully charged spares. While the standard advice is to keep them in your interior pockets to stay warm, this creates a practical dilemma:
- Exposure Risk: To reach an inner pocket, you often have to unbutton your coat or remove a glove.
- The Clock is Ticking: Once you expose your core or your bare hands to subzero air, you risk hypothermia or frostbite.
My Workflow: I suggest keeping your car nearby and running if possible. When a battery dies, jump back in the vehicle to swap it out, warm your fingers, and have a sip of coffee before heading back out.
The Challenges of Mobile and Drone Photography
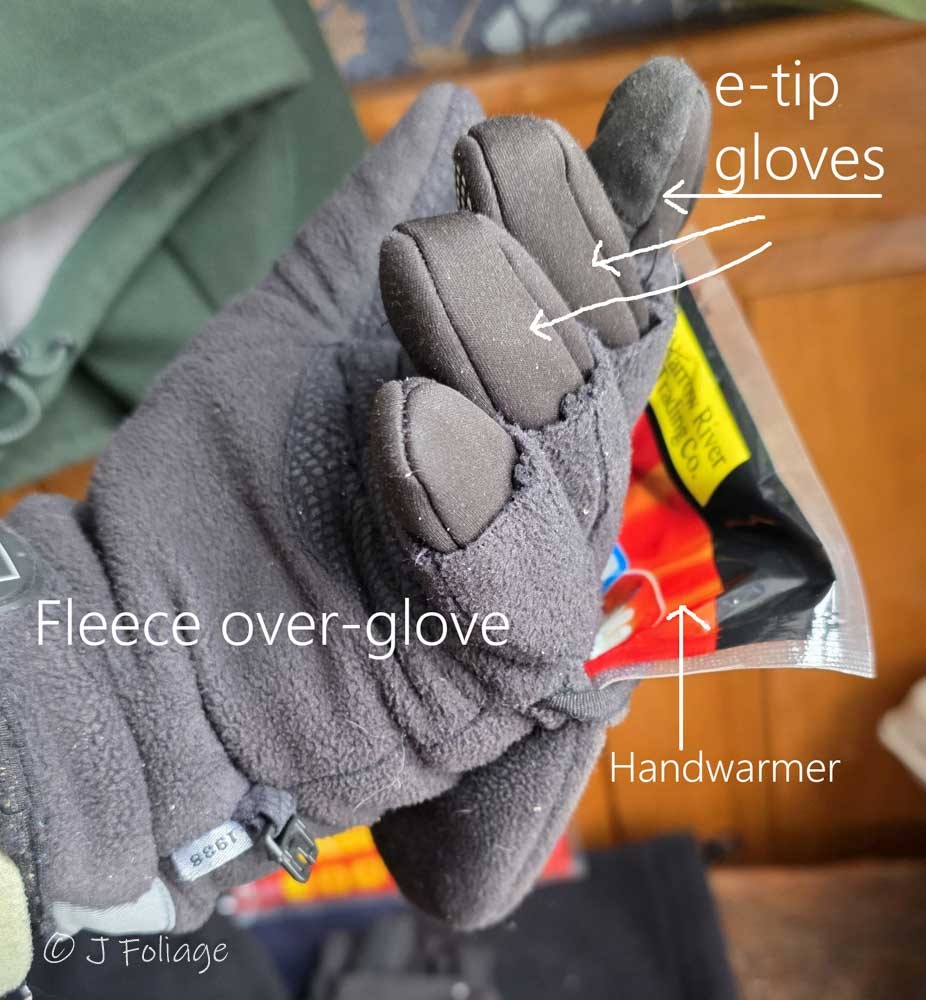
Using a cellphone requires high dexterity. Even with e-tip gloves, your hands will likely get cold very quickly because those gloves lack heavy insulation. (Check my clothing section below for my two-glove solution).
Flying Drones in extreme cold While manufacturers like DJI generally recommend staying above 32°F, I have successfully flown in temperatures as low as -8°F. (for short periods, watch battery levels)
- Stay Sheltered: I set up and launch from the warmth of the car, only stepping out briefly to place the drone on the ground.
- Reduced Flight Time: Expect your flight time to be cut in half. A battery that usually lasts 20 minutes might only give you 10 minutes in these conditions.
Tripods and Accessories
Don’t forget your hardware. Plastic and carbon fiber can become brittle in extreme cold. Be gentle with the snaps and locks on your tripod legs to avoid cracking them. Aside from batteries draining, these mechanical issues are usually manageable if you are careful.
❄️ Cold Weather Photography: Quick Gear Checklist
- Power Management: Carry at least 3–5 spare batteries; keep them in a pocket close to your body heat.
- Drone Safety: Always pre-heat batteries before flight and expect roughly 50% less flight time than usual.
- Tripod Care: Avoid forcing frozen leg locks or snaps; carbon fiber and plastic can become brittle and crack in subzero air.
- Smartphone Use: Use a two-glove system (lightweight e-tip liners inside heavy mittens) to maintain dexterity without exposing bare skin.
- Transitioning Indoors: When finished, place your camera in a sealed bag before going inside to prevent condensation from forming on (and inside) your gear.
Protective clothing
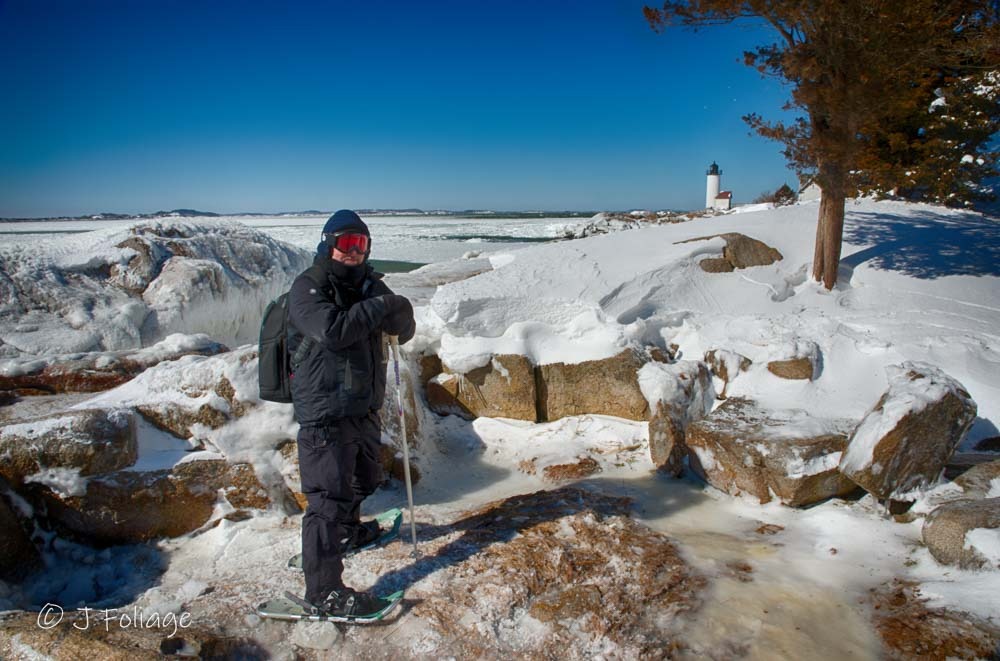
This is me fully layered for the cold, and below is my list of what I wear for cold to sub-zero temperatures.
Top to bottom
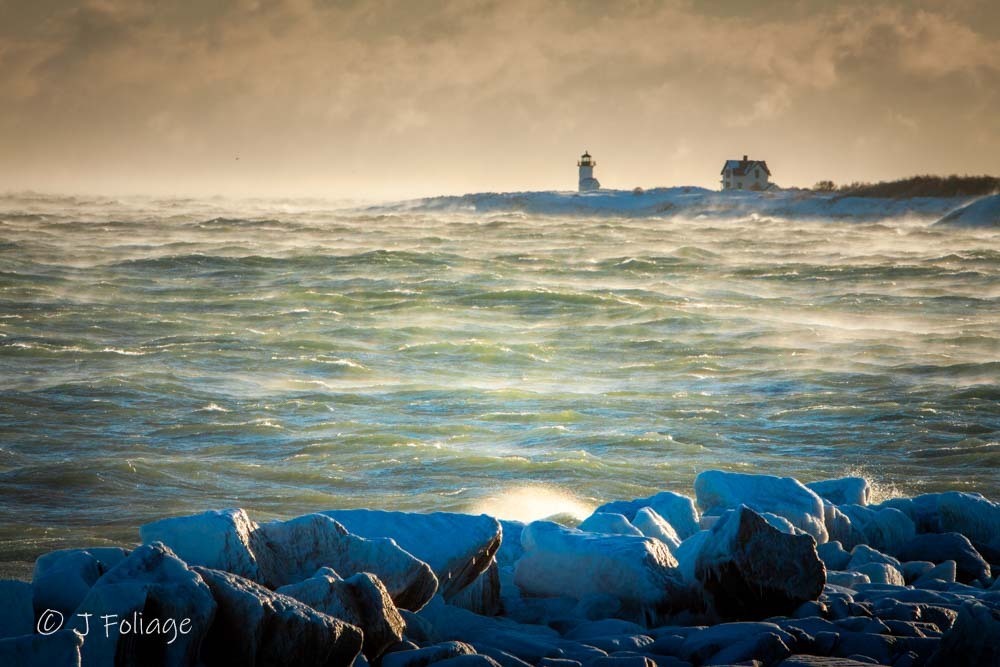
Wind chill: The winds were variable from 10mph gusting to 50mph. You can calculate your own local wind chill at this NOAA website. The day from this picture, the actual temp was -4, but with the wind, the wind chill gave us in the range of -16 to-38 degrees.
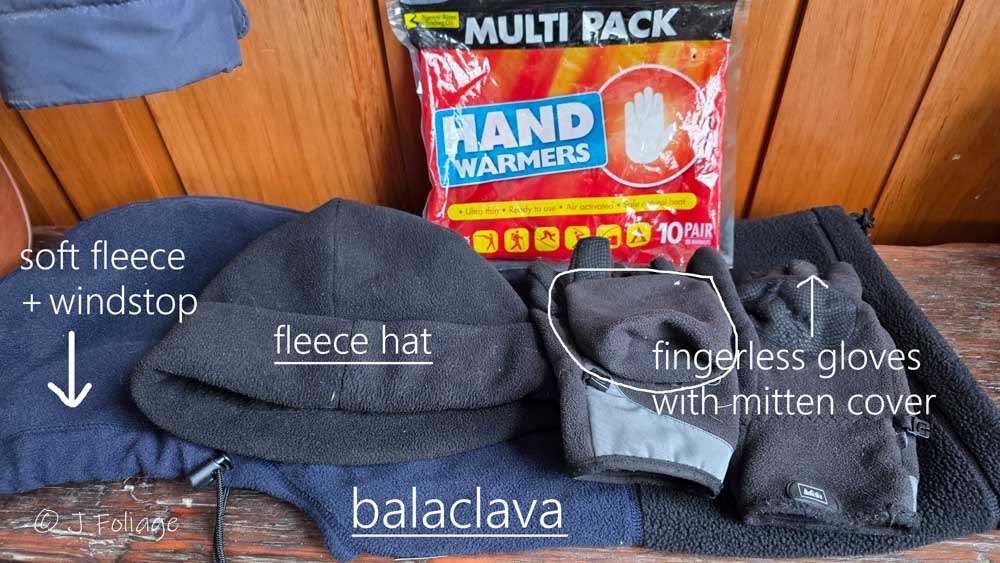
Head/hands/feet: These are the main danger points when we consider frostbite. My clothing is not super high tech or expensive, but I generally wear fleece and different types of undergarments. That said, I’ll start at the top. (There is no right or wrong here, just what I do.)
Head: wool watch cap (I now wear fleece), and a full head-to-shoulders balaclava that is both fleece and full wind stop, so my ears, forehead, cheeks, and below my nose were all covered and quite comfortable. I also have a pair of ski goggles that helps to cover most of my face except the tip of my nose. Why googles? I did not want my eyes exposed to the cold.
Upper body: A silk weight shirt under shirt or longunderwear, A North Face light fleece shirt, Columbia fleece coat with wind-stop, A Marmot minimalist jacket for an outerlayer (that the rest of the year acts as my raincoat) used as a final shell over it all. Again, no part of my body were cold (“My finger tips still got cold”).
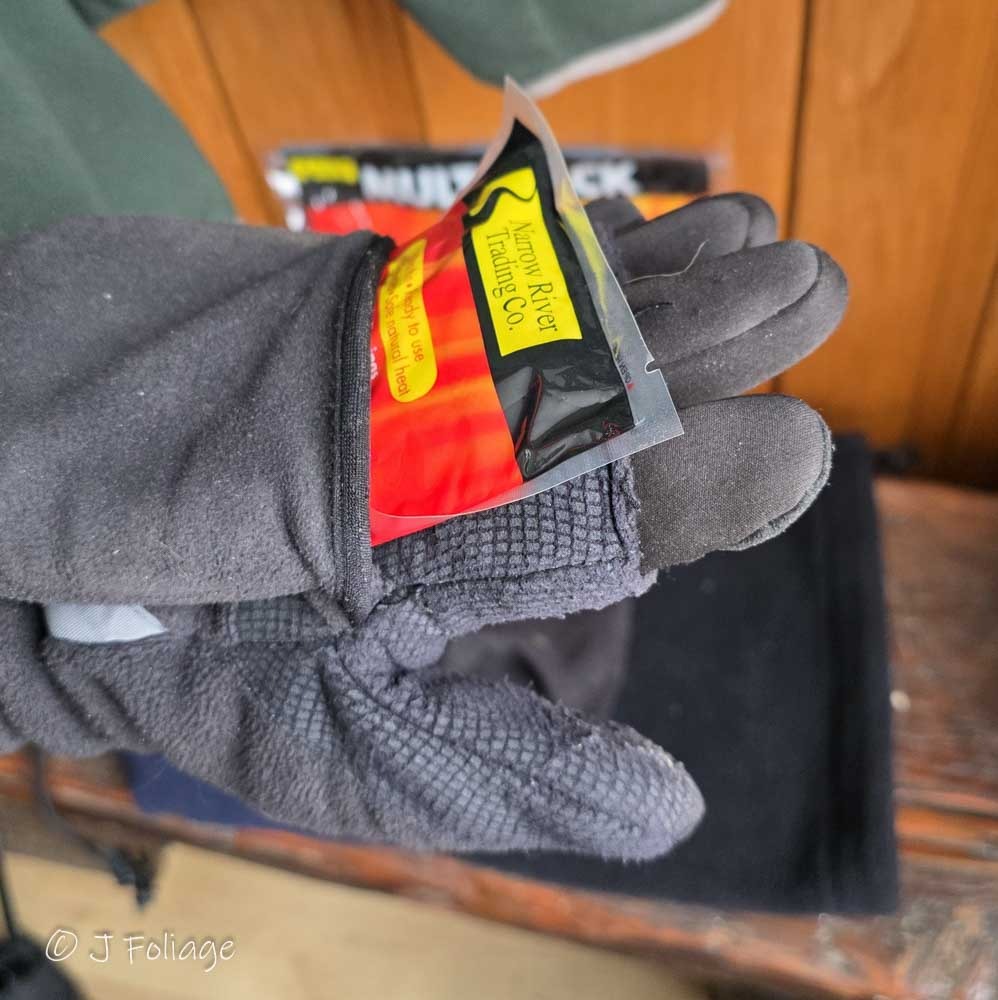
Hands: I have a pair of North Face e-tip gloves that are light and allow me to use my cellphone, but they are too light by themselves, so I added a pair of mitten-gloves (the upper portion slides off the fingers to expose the finger tips to manipulate your camera. Together, they were a 70% solution as my fingertips still got cold. I will also put hand-warmers in the flip-top pouch of the mittens. (The Amazon affiliate links are for suggestions for what I always use)
Lower body: I had silk-weight long johns, Jeans, and unlined rain pants (to stop the wind), no issues there. You could also go with lightweight snow pants for extra protection. But since I stay within a short walk of the car, my three layers worked well.
Feet: Cotton sock as an inner liner, Merino wool (medium weight) hiking sock, sneakers (yes, sneakers), but you could go with *lined hiking boots. I would recommend that. Since I did not have lined boots, I used what I did have. I have Neo over-boots, (they now make insulated ones) which gives me another layer. If I had felt my feet were cold, I would have dropped a chemical hand-warmer in each boot, but I didn’t need them. With this technique, I’ve never had foot-related issues.
In the picture above, I had Tubbs snowshoes, which were a little overkill, but if crossing a snowfield is needed, this could be good
Other items: a camera backpack (Lowepro) and a pair of Cross-Country ski poles that I found in someone’s trash pile.
Preparation equals Results:
By the time I’m ready to go out, I usually feel like Pillsbury Dough Boy. But all these precautions ARE needed to be outside in relative comfort and safely return with images that most people will never venture forth to capture… Hmmm, maybe I was an adventure photographer after all?
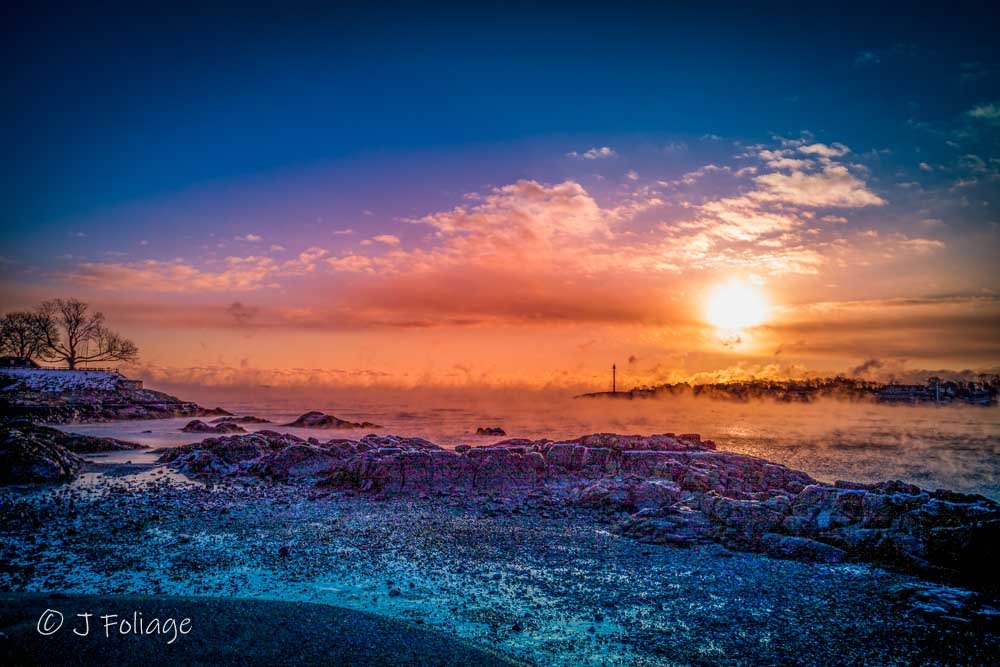
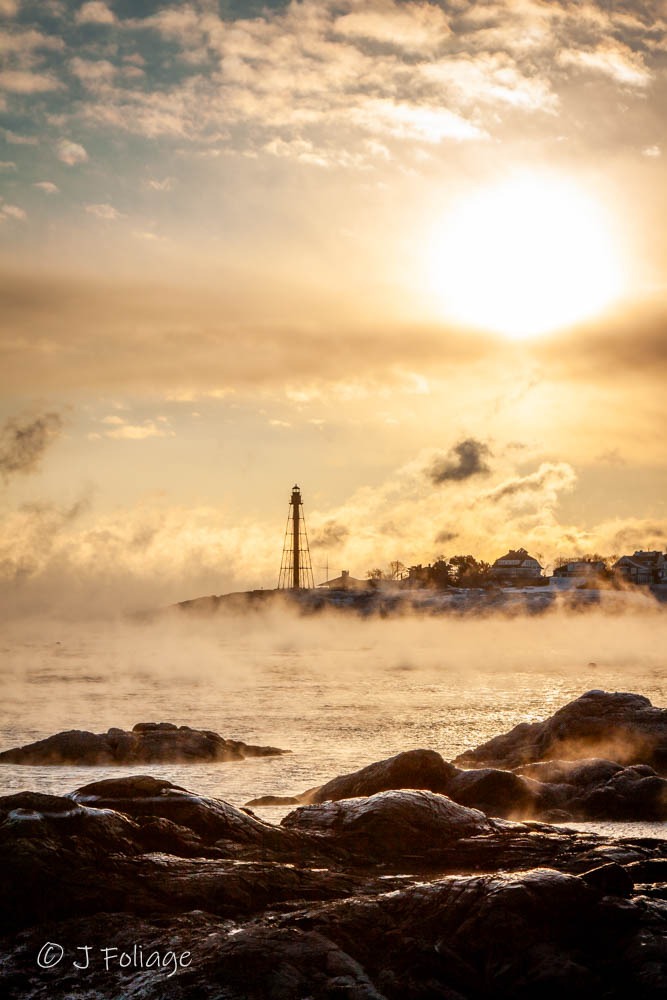
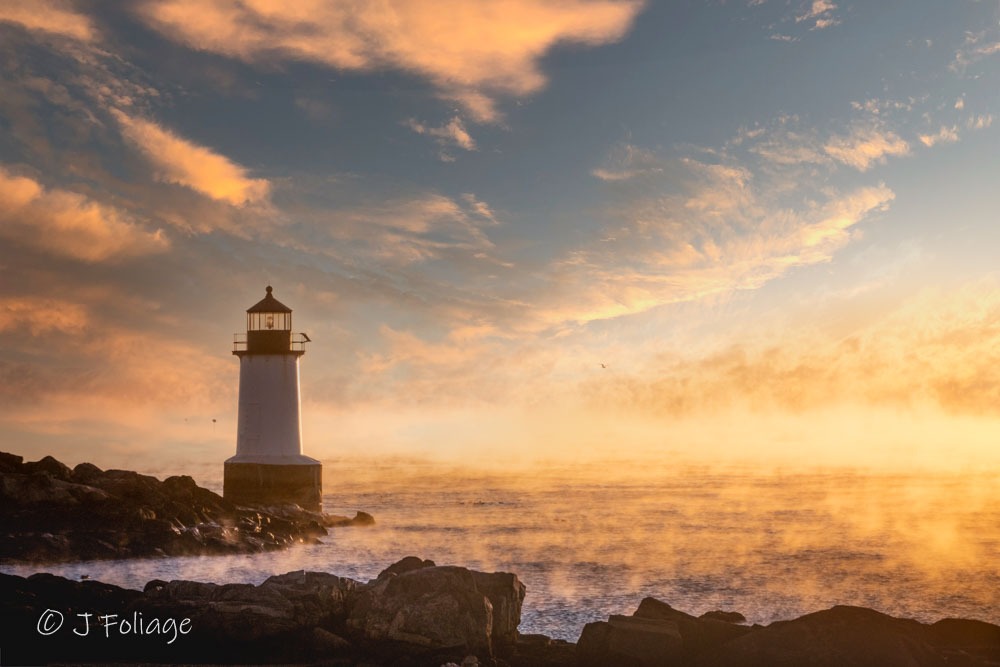
The earlier you arrive in your location to capture the sun appearing low on the horizon, the warmer the color temperature of the sun’s light. The higher the sun rises, the cooler the temp of the light. Also, as the sun rises, the “actual” air temperature will begin to rise as well. This means the sea smoke will dissipate quickly as well.
This is not an all-day event. Only at the cusp of sunrise will you have the possibility of the correct circumstances. All of your planning can also be ruined by winds coming through and blowing away the fog. So many things can go wrong but they also can go right…😍😮😰
Jeff “Foliage” Folger
You can purchase my images by visiting
Fine Art America for prints, home decor, and more
Join Jeff on his social media by clicking on any of the following.
On Bluesky at https://bsky.app/profile/jeff-foliage.com
On Instagram at https://www.instagram.com/jeff_foliage/
On Facebook at https://www.facebook.com/Vistaphotography/
Comments
Catching sea smoke – How hard can it be? — No Comments
HTML tags allowed in your comment: <a href="" title=""> <abbr title=""> <acronym title=""> <b> <blockquote cite=""> <cite> <code> <del datetime=""> <em> <i> <q cite=""> <s> <strike> <strong>